Step-by-Step instructions (with pictures!) on how and why you should verify your blog with Pinterest (the easy way).
Today I want to talk to you about verifying your blog on your Pinterest account. This is an amazing way to gain traffic and brand recognition on Pinterest.
Benefits of verifying include:
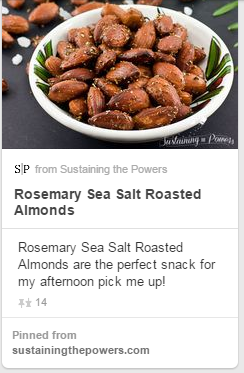
Your blog name and your site’s favicon (that little image on the browser tab above) below each pin from your website. Here’s an example of one of my verified pins:
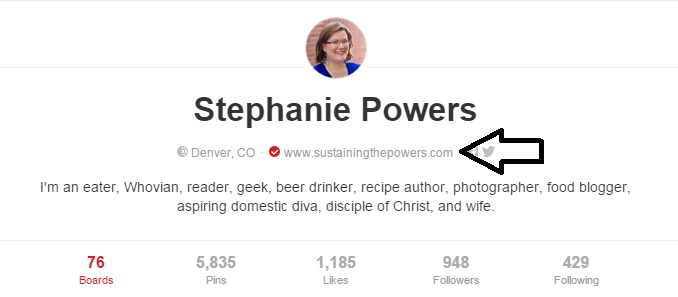
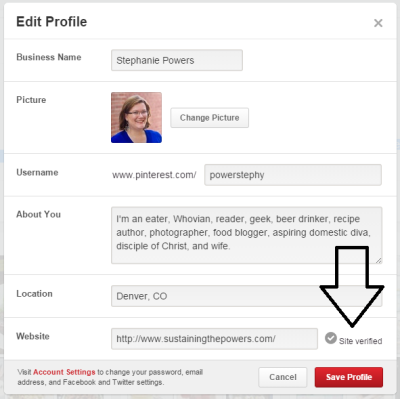
Your blog’s full URL in your Pinterest profile. Here’s mine:
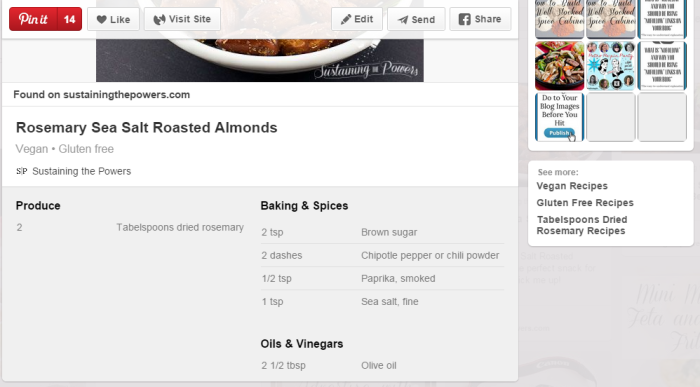
The ability to have Rich Pins (you’ll need to have meta tags in your theme to use this, but many plugins and themes include these already). Rich pins are amazing because people can see an excerpt of the blog post, the ingredients for a recipe, the info about a movie, prices for a product, or maps for a place. Don’t you just love it when you can preview the pin before you click through? Here’s a rich pin for one of my recipes (I did note the typo too – eek!):
Pinterest Analytics. Easily track what pins are popular and which posts are being pinned.
Better search engine results for your Pinterest profile which results in more followers and more direct traffic to your blog.
More traffic to your blog through Google search results. If you’re verified, the pins and Pinterest boards from your blog show up in Google image results and search engine results. That has been great to send traffic to my blog. My most viral pin about How to Throw a Doctor Who Party is one of the top results in Google image search for Doctor Who Party and sends at least 60 page views/day to my blog. This didn’t start until after I verified.
Okay, so are you ready to jump on board to verify your blog with Pinterest now? If you have WordPress, I’m going to show you the easy way. 🙂
1. Search for and install the Pinterest Verify plugin by Phil Derksen
2. Go to your Pinterest profile (it will look something like: http://www.pinterest.com/powerstephy/) and click “edit profile” at the top right.
3. Enter your website URL where it says “Website”
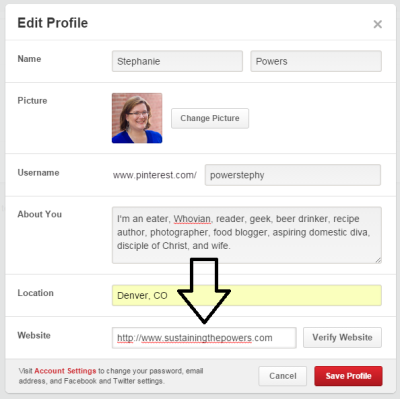
4. Click “Verify Website” and a box will pop up.
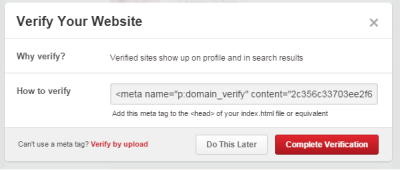
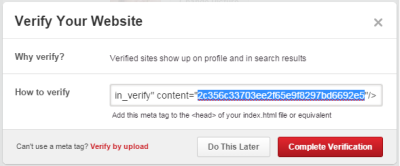
5. Copy the string of letters and numbers that appear just after the word content and leave this page open.
6. On a new browser tab, go to your blog’s dashboard, open your plugins page, and click on the button at the top to setup the Pinterest Verify plugin.
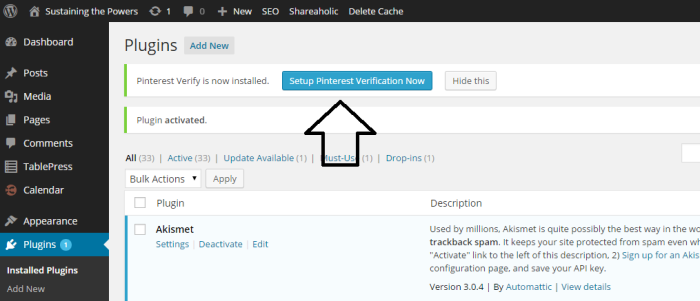
7. Paste the string of code you just copied from Pinterest into the box of the Pinterest Verify plugin and click “Save Changes”
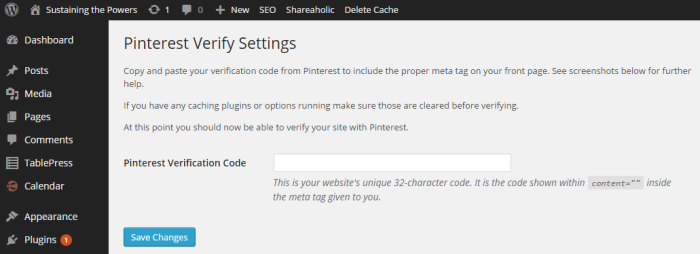
8. Go back to Pinterest and select “Complete Verification”. Your setting page should now say “site verified”. Congrats! You’re done!
**If you don’t have WordPress, you should check out this tutorial for verifying your site using meta tags or uploading a file.
But what about Rich Pins you ask?
1. Once you verify, you’ll need to make sure you have a plugin that has put the meta tags in the right places on your site. SEO plugins like Yoast SEO do this as do most recipe plugins like Easy Recipe or Ziplist. So be sure you have a plugin like that installed.
2. Once your site is ready for rich pins, you’ll need to validate your Rich Pins and “apply” with Pinterest to have them.
3. Log into your Pinterest account then take a quick trip over to the Pinterest Validator Tool.
4. Paste a link to any of your posts that you want to have Rich Pins for into the box and click “Validate.” You should get a message saying your site has been submitted for approval and an example of what your new Rich Pins will look like. If you have issues here, make sure you’ve installed a plugin like Yoast or a recipe plugin that adds the meta tags, and you’ve also linked to a post that has a recipe or other type of rich pin content.
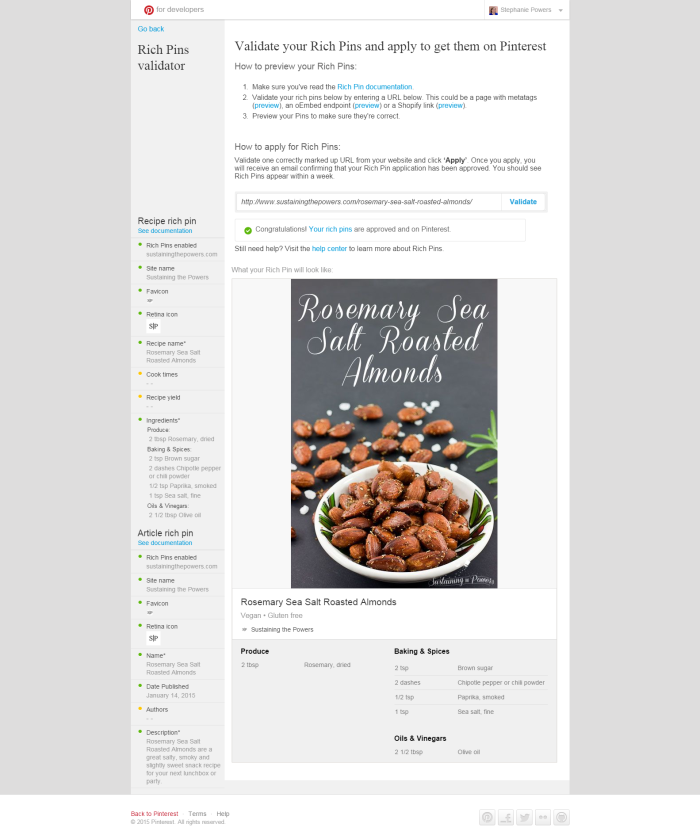
5. Wait a week or so (I’ve seen it take as long as 2-3) and you should receive an email saying you now have Rich Pins on Pinterest!
Are you verified? Do you follow me on Pinterest? You will love my Blogging Tips & Tutorials board:
Follow Stephanie Powers’s board Blogging Tips & Tutorials on Pinterest.


This is one of the best things you can do for your blog! Pinterest has always been my biggest source of traffic, and it’s so much higher now that I have Rich Pins and a verified site. I love the new smart feed, too, it brings me a lot more traffic.
I still have mixed feelings about the smart feed. It gives higher rankings to pins that already have a lot of traction behind them with likes and re-pins, so a lot of my older, popular content is being shown to more people and generating more page views, but my new content is pretty much just getting lost. In the past, a new recipe would be re-pinned from my board about 10 times on the first day I put it on pinterest. With the new feed, I’m getting maybe 1 re-pin, sometimes none. So I’m happy about page views, but not as happy about losing my best source for promoting new content. Has your experience been similar? Or different?
I definitely get more traffic from my older posts, but I had to change my strategy in order to get my new pins to do well. In the past, I just pinned to group boards and got lots of repins and traffic from that. Now I have to focus more on getting comments, likes and repins by participating in FB group threads. I’ve also noticed that my pins do better being on my regular boards rather than group boards. But I still pin to group boards just in case.
Thanks for the reply! That’s interesting that the group boards dynamic has changed now. I wonder how they weight things.
I verified mine a year ago or so, but it was pretty hard to figure out! This will be so helpful to a lot of people, I’m sure! Thanks for sharing!!
I’m glad you’re already verified. It used to be super complicated, especially if you didn’t have access to the FTP side of your server. The plugin has made it so easy I just had to share!
Ah, this is so helpful! I tried verifying my site some time ago and gave up! Thank you for this guide, Stephanie. Do you happen to have a post on creating and uploading favicons?!
I’m so glad it worked for you Liz! It can get tricky, especially if you don’t want to mess with code. I don’t currently have a post on favicons, but you must be reading my mind because I have one in the queue for next Thursday! I saw that you just followed me on Bloglovin’, so you should be one of the first to know about it. 🙂
Thanks for putting this together Stephanie!! I just applied for Rich Pins. 🙂
I use Blogger through google, do you know of any guides on that? I have Pinterest for Business, and my website is confirmed but not verified.
Thank you so much for this tutorial, wish it worked with Blogger. 🙂
Hi Victoria! Thanks for stopping by. Did you already try the tutorial that I linked to in the post for people who don’t have WordPress? http://www.aroyaldaughter.com/2013/03/05/how-to-verify-your-pinterest-account/ I think it should get you all set up on Blogger!